How do you Preserve your Priceless Photo Collection?
Photography in the Pre-Digital Era
If the thought of digitizing your photo collection
overwhelms you, this article will assist you in evaluating several options for
preserving those paper photographs.
Three approaches to digitizing are presented based upon the size of your
current photo collection.
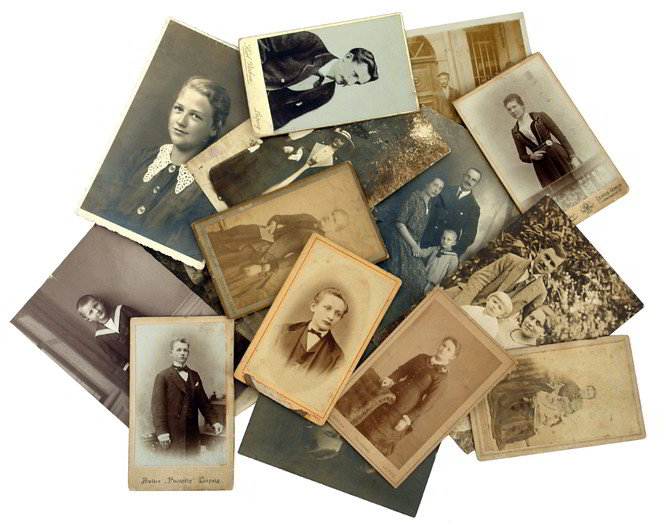
Anyone who owned a camera before the year 2000 likely has boxes, albums and scrapbooks filled with photographs capturing cherished family moments. Paper photographs tend degrade over the years and run the risk of being stolen lost or destroyed.
In order to protect, preserve and share your precious memories digitizing them is the way to go. Digital copies take up very little physical space, don’t degrade over time and can be easily shared with friends and family. You can repair a damaged photo or fix color palette issues by first digitizing and then editing the image. Also, the more copies of pictures floating around, the better the chances of them surviving to be enjoyed by future generations.
Photo Collection: First Things First
The first decision to be made is what resolution to scan the photo in at. The two standard resolutions are 300 dpi and 600 dpi. Your choice will depend on what you will be doing with the digital images. For most uses including printing same size copies, slide shows or displaying on the web, 300 dpi is quite sufficient. If however, you plan to blow the picture up to poster size or zoom in on a particular portion of the image 600 dpi is more appropriate. Keep in mind that 600 dpi scans will take longer to scan and take up a lot more disk space (over a megabyte apiece).
Option 1: Flatbed Scanner
Most people these days have an all-in-one printer that comes with a flatbed scanner built in. You may not realize it, but your printer’s scanner combined with the software that shipped with it are all you need to scan in your photographs.
This option works best if you only have a small number of photos to scan, certainly not more than a couple hundred. The process of placing a picture on the glass, scanning and selecting a descriptive filename repeated dozens of times can become incredibly tedious. The advantage to this approach is that the cost is essentially zero as long as you already have the scanner.
Option 2: Hiring a Digitizing Service
The next option is to hire a company to do the work for you and send back the files on a CD or DVD. There are dozens of companies vying for your business. Simply Google “photo scanning service reviews” to find current reviews of companies available to meet your needs.
The last time I checked, print scans costed 39 cents per 300 dpi scan and 49 cents per 600 dpi scan. For example 300 photographs at 39 cents would cost you about $117.00 for the job. So, you can see that digitizing a large collection could run you into some big money.
The other downside of using a digitizing service to digitize your photo collection is that you have to mail your pictures to the company you hire. There is a risk, albeit small, that the package gets lost or damaged in shipping.
Option 3: Buy a Digitizing Device
The last option is to buy a device specifically designed for digitizing photos such as the Epson FastFoto FF-640. This device is not exactly inexpensive, but for large collections the investment makes financial sense. You just put a stack of up to 30 photographs at a time in the document feeder tray and press the scan button.
Epson claims that the machine averages one second per photo, so it will process that stack in under a minute. As the FastFoto name implies, that is very fast for high quality scans. There are also features for scanning both sides of the photo, automatic color correction, and loading the image files directly to a cloud provider or Dropbox.
At first glance the FastFoto appears to be quite pricey, but once you see how lightning fast it works and factor in the time saved by this device, you will consider it a bargain.
I personally own one of these Epson FastFoto units (pictured below) and I am still amazed every time I use it, at how fast a stack of photographs sitting on my desk can be converted into digital images on my computer. The quality of the images are also outstanding; I rarely feel the need to go in and digitally edit photographs other than rotating or cropping.
Regardless of which
method you choose to digitize your photo collection, the time is now to get your paper photographs into digital
form. With the proliferation of smartphones, digital is the new currency for
working with photographs.
Read related articles: Best Practices
Recent Articles
Colorize your Genealogy B&W Photographs for Free
How to Overcome Procrastination Today
5 Genealogy Books that Will Make You an Expert
Using Historical Maps for Genealogy
Researching North Dakota Ancestors
Most Popular
Leading Causes of 1800’s Infant Mortality
Download Free Genealogy Charts
Exploring FamilySearch’s Facial Recognition Tool
One-Step Genealogy with Stephen Morse
Searching Castle Garden Passenger Lists
Researching Last Name Meanings and Origins
The Real Truth about Family Coat of Arms
When to Employ Reverse Genealogy
Researching Ancestors Using Obituaries
Using Cyndi’s List for Genealogy Research
FamilySearch: A Necessity for all Genealogists
Ancestry.com: Getting the Most from your Subscription
Article Archive
Getting Started (19)
Record Sources (24)
Tricks of Trade (33)
Best Practices (29)
Brick Walls (20)
Family Story (21)
Product Reviews (21)


Beginner
Guide
Genealogy Quick Start Guide for Beginners
Applying the Genealogy Proof Standard to your Research
Google Genealogy Research Toolbox
Find Records
Researching Ancestors through Military Records
Using the National Archives (NARA) for Genealogy Research
Using U.S. Census Records
Canadian Genealogy Research using the Internet
Tips
Genealogy Source Citations Made Easy
Listening to Genealogy Podcasts Made Easy